Friday, 13 March 2020

Filtering web-traffic to specific Countries


There are numerous tools and methods to manage traffic to web servers, and here we are going to review the steps to block/allow Apache web traffic based on origin country. You can redirect or block web traffic of your client using the GeoIP module. This would be helpful in Fraud Detection, Target Content, Spam Fighting, etc.

Installing  GeoIP

GeoIP is a library that enables the user on finding the accessing IP-address’s origination.  On day-to-day server management, requirements and purposes may vary and one may need to block traffic from certain countries reaching your Apache webserver.  Here we are going to use the GeoIP module with apache in achieving the same. Installing GeoIP Library, GeoIP database, Apache GeoIP module, and the GeoIP update script.

# yum install epel-release
# yum install GeoIP GeoIP-GeoLite-data geoipupdate mod_geoip

To verify the above installaton, you can test with ‘geoiplookup’ command and it is also important to keep the GeoIP database updated and can be achieved by ‘geoipupdate’ command.  However, a cron to run ‘geoipupdate’ can be created with your frequency.

Updating Apache configuration to enable GeoIP:

Module mod_geoip handles the services in apache web server and the generic configuration file is located at /etc/httpd/conf.d/geoip.conf.
Edit the geoip.conf file to enable GeoIP, specify the DB path and enable GeoIPScanProxy Headers.
# cat /etc/httpd/conf.d/geoip.conf
<IfModule mod_geoip.c>
GeoIPEnable On
GeoIPDBFile /usr/share/GeoIP/GeoIP.dat
GeoIPScanProxyHeaders On
</IfModule>
#


Blocking Country:

To block countries from accessing your webserver add Deny rules in /etc/httpd/conf.d/geoip.conf .
Example 
# cat /etc/httpd/conf.d/geoip.conf
<IfModule mod_geoip.c>
GeoIPEnable On
GeoIPDBFile /usr/share/GeoIP/GeoIP.dat
<Directory />

SetEnvIf GEOIP_COUNTRY_CODE AN BlockCountry
SetEnvIf GEOIP_COUNTRY_CODE BL BlockCountry

# add any number of countries here based on your requirement
# you can refer to the country codes in GeoIP website.

Deny from env=BlockCountry
</Directory>
</IfModule>
#

Note: Restart apache server for any changes done to take effect.


GeoIP Country Codes


Quick Reference country codes (Mod GeoIP)

/etc/httpd/conf.d/geoip.conf
Example Usage as mentioned earlier
 SetEnvIf GEOIP_COUNTRY_CODE CN BlockCountry


Hope this helped you to redirect or block web traffic of your client using the GeoIP module. If you find any difficulty in blocking/allowing Apache web traffic we can help you.

You can check our previous blog: Remove error_log files on a cPanel server

Follow us for more updates on Facebook, Twitter

Tips to fix Cloudflare error 522


Looking for a solution to fix your Cloudflare error 522, then here is the fix. When you try to access a website that uses Cloudflare, you might come across 522 error, which shows “ERR_CONNECTION_TIMED_OUT”.  This happens when Cloudflare times out contacting the parent web server.

The Code 522 stands for 'Connection timed out', and occurs when there is a high usage of Cloudflare, but the major cause of error 522 can be due to:
  • Overloading of the Parent/Origin Server may Take Place
  • Firewall Block
  • Problems in Routing
  • Incorrect IP Address in the DNS Settings

Quick Tips:
Ensure that you are blocking Cloudflare IPs in .htaccess, iptables, or your firewall
Ensure all our IPs are whitelisted, If not you can see 522 errors in certain locations

Solution to fix Cloudfare Error Code 522


  • Disable interfering Plug-ins
Sometime, specific plug-ins that create a variety of queries more than the required and an increase in the corresponding database will generate a high load on the server.
To get rid of this problem, you need to install the Plug-in performance profiler and it helps to detect which plugins are mischievous with the overloaded queries in the database. Once the issues are identified successfully, you can uninstall the interfering plugins and check if the problem is fixed.
  • Enable Cache Plug-in
The cache is that part of the memory that stores the data from the website you visit frequently. Therefore you can reduce the server load by decreasing the queries to the corresponding database. You can easily improve the connection speed of the server with the help of the cache plugin. Use the WP Super Cache plugin on a shared hosting service.
  • Manage Configurations
By managing, the configuration setting of the server can cause this error 522 to disappear but this is a lengthy task. First, you need to remove the domain on Cloudflare, then install the cPanel again and add the domain name. This kind of process will help to remove the bug.
  • Image optimization
The process of compressing the image size for better optimization will help to reduce the server load and decrease bandwidth consumption. Consequently, it will increase website speed.
  • Contact Hosting Provider
You can check with your hosting provider to identify any blocking attributes to Cloudflare systems. Contacting your hosting provider would ensure that your server does not block any of the Cloudflare’s IP’s.
  • Implement Lazy load plug-ins          
You can reduce the usage of image bandwidth to an extent with the help of these plug-ins and thereby enhance the performance on a large scale.

Wrapping up:

Make sure your website responds to Cloudflare queries within 60s by compressing your image, activate the 'keepalive' message, and optimize your database. Thereby you can reduce your bandwidth consumption. 

Check our previous post: Filtering web-traffic to specific Countries

Follow us for more updates on Facebook, Twitter

Friday, 21 February 2020

Remove error_log files on a cPanel server


We will show you how to free up disk space by deleting/removing error_log files. You can remove the error_log files either by a single command or using a CRON JOB for automatic removal.
Note: Take the backups before you start. If you have limited server resources, then it would take a long time to run these commands.

Locate error_log Files on cPanel Servers:

First, let’s locate the error_log file using the command;
 find /home -type f -iname error_log -exec du -sh {} \;

-type: Specify the type to find.
-iname: Specify the name to find.
-exec: Execute the “du -sch” and lists the output with file size.

If you want to list the error_log files bigger than 50MB? You can use the below command, but remember that based on the file size you choose the run time of the commands would increase accordingly.

find /home/*/public_html -type f -name error_log -size +50000k -exec du -sh {} \;

Remove all error_log files:

The command “find” has a “delete” option to remove all the error_log file from the directory. Check the below command to remove error_log files:

 find /home -type f -iname error_log –delete
-delete: This switch used to remove all the outputs from the find command.

Remove error_log files using CRONJOB

The command “CRONJOB” is used to remove the error_log files periodically. Follow the below code to create cron.

/bin/find /home -type f -iname error_log –delete

For example:
* 21* */bin/find/home –type f –iname error_log –delete

This command line will delete all the error_log files periodically every day at 9 PM server time.
If you find any issues in a particular file, you can change the file location accordingly.

You can also check : 7 Tips to free disk space on cPanel server

For more tips and updates follow us on Facebook, Twitter


Thursday, 13 February 2020

Fix SMTP error 421, 451


Well, you might be receiving an error message while sending an email to your recipient in the form of a three-digit number, each containing a detail about the server or an answer to a command. First, try restarting the mail server but if it keeps coming up follow the steps below. So let’s see how to fix SMTP error 421, 451:

421 SMTP Server error: too many concurrent sessions

SMTP error 421 denotes either a temporary problem on the mail server or a problem with the recipient's email account.

If you reached a limit (restriction) on your mail account you may get a 421 error as some mail providers might return this error.

Depending on the cause we will see how to fix SMTP error 421. You need to try each below solution until it’s fixed.

Solution1: Fix the Outlook Configuration Issues


If this issue is caused right after the configuration of the outlook account, then the error is occurred due to a configuration mistake. The invalid port number setting or mail server name will show “421 cannot connect to SMTP Server” error while sending or receiving an email so remove the email account and add the account again.

To add the configuration correctly follow the below steps:
Step 1 - Open Outlook account and go to File > Account Setting, Select the email account and click Remove button.
Step 2- Once the account is removed, click the New button then select the Email account and enter the required information. Click Next and wait for the settings to be configured and check the test mail sent.
Step 3- If the test email delivered successfully, then your account is configured properly. In case, if you face the same error then follow Solution2.

Solution2: Change the SMTP port number


When you enter a wrong SMTP port number you will end up receiving an SMTP 421 error. You can check by changing the SMTP port number from Port 25 to 465 and see if the normal functionality resumes. 
For this you need to go to File > Account Settings, then choose the email account that’s affected and click on the Change button.
In the Change Account window, select More Settings > Advanced tab and now set to 465 in modify the Outgoing server (SMTP).
Ensure ‘Use the following type of encrypted connection: is set to SSL ‘.

Solution3: Check 3rd party firewall interference


Though the firewall protects us against malicious attacks, it can block certain IP ranges, so let’s test by disabling 3rd party firewall and send a test mail.
For that Open the Control Panel > under Programs and Features section choose your 3rd -party antivirus and uninstall it. Then check by restarting your PC.
You can install the firewall from the official site and re-check the error by sending a test mail.


Solution4: Check VPN interference


Try sending a test mail once after you disable your VPN connection, if the mail is sent successfully, then the VPN will be the cause of the error. If the error persists you might probably need to contact the VPN network support and ask to whitelist the email server.

SMTP error 451 Exchange Server Error


Next, we will see how to fix SMTP error 451. When you face issues as mail limits exceeded, DNS errors, unreachable mail servers, etc., the Email Relay environment will get affected due to a temporary exchange server. This 451 server error can be due to a discrepancy on Sender or Receiver Exchange server. Let’s see how to resolve the 451 server error.

Step to resolve Exchange Server Error 451


Inspect Queue Viewer
  • Open Exchange Management Console > Click Edge Transport server.
  • Then go to toolbox > Queue Viewer.
  • Select Mail Flow tools > Queue Viewer tool.

Verify DNS Configuration

  • Login to the Edge Transport server locally and use Console Switch, if you are accessing “Remote Desktop Connection”.
  • Next, open Exchange Management Console > Edge Transport Server > properties.
  • Then go to Internal DNS Lookups and check whether it is in Default Configuration Setting. If not, set it to Default.

Implementing Internal and External Lookups


1. Internal Lookups
When you have multiple network adapters, you need to go with an Internal Network Card and then choose the card to access the DNS setting. If any misconfiguration occurs, it will allow all the IP addresses to modify.
If there is no IP address detected, then the NIC card might not be configured with DNS server entries. Therefore fill the card with appropriate details and confirm the configuration.   

 
2. External Lookups
If you are using a single network card with public DNS, modification of configuration may affect external resolution and it might stop the email flow.

Command Line tools to test DNS Server


NSLOOKUP – To get DNS records that hold Server & IP address Information.
TELNET – To test ports.


Locate IP Address of the Server
  • First, type “nslookup” to find a server IP address and click to open the NSLOOKUP tool.
  • Next, type set type=mx and press enter.
  • Finally, enter the domain name you wish to extract the MX record and hit enter.

Check out SMTP connection Via TELNET command

  • Open Command Prompt (cmd) and enter telnet.
  • Enter set logfile (location:/filename)
  • Next, type open mail.abc.com 25 and press enter.
  • Now type the command EHLO contoso.com and execute it.
  • Compose test email message with parameters like from, receive, notify, data and subject.
  • After the process termination, it will generate a success or failure confirmation report.

Hope you would have fixed. If the issue still persists or any other email error Try Expert Solution.
For more tips and updates follow us on Facebook, Twitter

Wednesday, 5 February 2020

Hybrid Cloud – The key survival in today’s business


Cloud technologies are one of the mainstream options in the IT world and global enterprises have already migrated into cloud computing. Due to a lack of control and privacy, opting to go fully on the public cloud will not be the best for IT infrastructure. So if your enterprise is looking for the benefits of both Public and Private Cloud, then the best option would be a hybrid cloud.

‘’ Right Scale survey estimation indicates that enterprises with a hybrid cloud strategy have grown to 58% in 2020, up from 51% in 2018. It also says that 28% of enterprises who haven't yet adopted hybrid cloud consider it a priority to do so.’’

Now you might wonder why hybrid cloud is heading, the main reasons is its Simplicity, Security and Collaboration. As we know it’s not going to be an overnight success, but you can expect cost savings and increased operational efficiency if it is deployed properly.
Few companies are deviating from building their own data centers, as they can create one in the cloud with a few clicks of a mouse. Let us see what are the main advantage of adopting hybrid cloud systems for enterprises.

Key Benefits of Hybrid Cloud:

•          Security

When compared to other public clouds, the Hybrid cloud has a key potential to increase the security level. Using a hybrid cloud, companies can decide which applications or services can be stored in public and private clouds.  This helps you to keep all your sensitive data on a highly secured dedicated infrastructure. The proper integration of public and private cloud will play a better role in strengthening the security level. It also ensures the cloud space from overburdening. Therefore it provides end-to-end security for the data stored.

•          Cost-Effective

A hybrid cloud follows a pay-as-you-need model that is, you only have to pay for resources that you use. It offers you the flexibility to manage costs without comprising the quality of services i.e., its reduction in your Total Cost of Ownership (TCO). 
 

•          More flexibility

As we know flexibility is one of the core advantages that enterprises look for in the cloud environment. The hybrid infrastructure is designed in such a way that you get maximum efficiency and scalability.
You can choose where to put your applications, where they can run best etc., by providing a more way for flexibility than before. It combines the security of a private cloud with the scalability of a public cloud to meet your specific requirements.

Wrapping up:

In the upcoming days, hybrid cloud models will focus on keeping your core systems in place while using cloud applications to ‘innovate around the edges’. Being selective in choosing the right technology cloud players is key. When it’s used properly, Hybrid models can modernize and will be future-proof existing technology for your organization.

You can check our latest blog on: Run multiple PHP versions on the same server

Follow us on Facebook, Twitter for the latest updates.


Tuesday, 28 January 2020

Run multiple PHP versions on the same server


You would have faced the trouble of keep swapping the PHP version depending on the task in hand you need to use. With this solution, you can install multiple PHP versions in the system and make them work simultaneously.
To run two or more PHP versions for different sites on the same LAMP stack by using mod_fcgid to create a .fcgi wrapper script.  The script forwards all the PHP requests which were made from php-cgi binary.
Considering a server running on PHP 7.2  where a specific site requires an older PHP version (eg PHP 5.6)

Required Installation Packages

The php56-php packages are in the Remi repos and they install to /opt/remi/
In order to create the PHP wrapper script, mod_fcgid Apache module needs to be installed.
[root@server ~]#yum install php56-php php56-php-pear mod_fcgid

Remove alternate PHP configuration(s)

A configuration file to load PHP 5.6 would be created  into Apache at /etc/httpd/conf.d/php56-php.conf, which has to be DELETED else it would conflict with the existing PHP version and would fail Apache  to start.
[root@server ~]#rm -f /etc/httpd/conf.d/php56-php.conf

PHP wrapper script creation

This script will set the environment for the specific PHP versions. (here PHP 5.6)
Example path of a specified site '/var/www/www.actsupport.com/cgi-bin/php56.fcgi'
(name the script depending on the PHP version)

[root@server ~]#cd /var/www/www/actsupport.com/cgi-bin
[root@server ~]#vim php56.fcgi
#!/bin/sh
PHPRC=/opt/remi/php56/root/etc/
export PHPRC
export PHP_FCGI_MAX_REQUESTS=5000
export PHP_FCGI_CHILDREN=16
exec /opt/remi/php56/root/usr/bin/php-cgi

[root@server ~]#chmod +x /var/www/www.actsupport.com/cgi-bin/php56.fcgi
PHPRC is the path of the folder for php.ini and the exec is the full path to the php-cgi binary of the enabling PHP version, Update the values on your environment accordingly.

Update Apache Configuration

Append the Virtual Host for the specific domain on the question.
[root@server ~]#/etc/httpd/sites-available/actsupport.com.conf (Generic/Custom path based on the environment)
<IfModule mod_fcgid.c>
    RemoveHandler .php
    RemoveType application/x-httpd-php
    Action application/x-httpd-php5 /cgi-bin/php56.fcgi
    AddType application/x-httpd-php5 .php
    AddHandler application/x-httpd-php5 .php
</IfModule>

HTTPS config to be updated, if applicable
EDIT PHP config

Modify by commenting out the <FilesMatch> and SetHandler block because it can't be overridden by the RemoveHandler directive we added to the site's virtualhost entry.
It is being replaced with an AddHandler directive that performs the same purpose but will respect being overridden.

[root@server ~]#/etc/httpd/conf.d/php.conf
#    <FilesMatch \.php$>
#        SetHandler application/x-httpd-php
#    </FilesMatch>
       AddHandler application/x-httpd-php .php

PHP Modules Installation

The required PHP modules vary based on the site and if we restart Apache now, the alternate PHP version would run without the necessary modules and be incompatible accordingly. Though very few modules being installed by default the below list works in many setups. However, install other PHP modules that are needed as necessary and make sure to install the phpXX-php-* versions from the Remi Repo for any PHP versions used to avoid accidental module installation for the wrong PHP versions of human error prefix.
php56-php-gd
php56-php-mbstring
php56-php-xml
php56-php-mysqlnd
php56-php-mssql
php56-php-ioncube-loader

To install the above use
[root@server ~]#yum install php56-php-gd php56-php-mbstring php56-php-xml php56-php-mysqlnd php56-php-mssql php56-php-ioncube-loader

Also make sure the php.ini for the specific PHP version is probably located at /opt/remi/phpXX/root/etc/php.ini.

Finally restart Apache

Finally, you need to restart Apache
[root@server ~]#service httpd restart

Verify PHP changes

Create a info.php page and verify changes.
[root@server ~]#vim info.php
<?php
phpinfo:();
?>

I hope you have resolved the issue related to multiple PHP versions. If you need any assistance Contact Us.

For more tips follow us on Facebook, Twitter

Wednesday, 8 January 2020

Steps to Install Jira on Centos7


The bug-tracking tool Jira will track issues and bugs related to your software and Mobile apps. It is developed by an Australian Company Atlassian. You can manage your project easily, as Jira dashboard consists of many useful functions and features which make handling of the issue easily.

Now let’s see how to install and configure latest version of Jira on centos7


Steps to Install & Configure:

Install JIRA on Centos7
To establish Jira, you must require JAVA software package. So, First you need to check the Java package and its version by “JAVA – version” Command.
# yum install
java-1.8.0-openjdk java-1.8.0-openjdk-devel
# java -version
openjdk version "1.8.0_212"

Let's Install MySQL Database

Install and configure MySQL to start on system boot & set password.
# wget https://dev.mysql.com/get/mysql57-community-release-el7-11.noarch.rpm
# rpm -ivh mysql57-community-release-el7-11.noarch.rpm
# yum install mysql-server
# systemctl start mysqld
# systemctl status mysqld
# grep 'temporary password' /var/log/mysqld.log  ## to get default password ##
# mysql_secure_installation    ## use default password and change new password ##

Note: You have to set a strong password with uppercase, lowercase letters, numbers and special characters etc.

Now create MySQL Database and user for Jira with following commands:

# mysql -u root -p
CREATE DATABASE jiradb CHARACTER SET utf8 COLLATE utf8_bin;
grant all privileges on jiradb.* to 'jira'@'%' identified by 'password';
flush privileges

You should maintain a strong password otherwise you will get below error:

ERROR 1819 (HY000): This shows that your password does not satisfy the current policy requirements
For a simple password use below command in mysql prompt
SET GLOBAL validate_password_policy=LOW;
Now it allows to keep simple password.

Next exit from MySQL and then restart MySQL service as shown below
# systemctl restart mysqld

Installation of JIRA
To install Jira on centos7. Download the latest version of JIRA installer from: https://www.atlassian.com/software/jira/download

# cd /opt
# wget https://www.atlassian.com/software/jira/downloads/binary/atlassian-jira-software-8.6.0.zip
Then, Execute the .zip file and install JIRA.
# unzip atlassian-jira-software-8.2.0.zip 
# mv atlassian-jira-software-8.2.0-standalone atlasian
# mkdir /opt/jira
# mkdir /opt/jira/home
# vi /opt/atlassian/atlassian-jira/WEB-INF/classes/jira-application.properties
### set jira.home as jira.home = /opt/jira/home ###
# cd /opt/atlassian/bin
# ./startup.sh

Once after completing the Jira
Installation. You can now access Jira as http://ip_address:8080

To Copy the MySQL JDBC Driver
Download jdbc drivers from http://dev.mysql.com/downloads/connector/j/

You can either download .tar.gz or .zip file and copy the MySQL JDBC driver to application server file as shown:

# cd mysql-connector-java-5.1.47
# mv mysql-connector-java-5.1.47.jar /opt/atlassian/lib/
To Restart Jira service
# cd /opt/atlassian/bin/
# ./stop-jira.sh
# ./start-jira.sh

Hope it helps. If you need any assistance Contact Us

Read our existing blog post : Steps to install PhantomJS On CentOS7

Follow us on Facebook & Twitter for more updates


Friday, 6 December 2019

Check Iptables Firewall set up on Centos 6


You can use Iptables to secure your Linux server or VPS. With Iptables you can monitor the traffic of your server using tables, which are a set of rules called chains. Iptables is a flexible firewall tool and few tricks and commands could make working with Iptables much easier.

To configure firewall rules for IPv6, you will have to set up the ip6tables service. If you are using CentOS 7, you will need to set up your firewall using firewalld.

Now lets see how to create a simple firewall on a Centos VPS:

Decide the services and ports to open

Once you have choosed the port to be opened, all other unnecessary ports will be blocked.
You are going to leave SSH port open so that you can connect to the VPS remotely:
let’s say, port 22.
For web traffic open port 80 and 443. To send email, open port 25 (regular SMTP) and 465 (secure SMTP) and to receive open the usual port 110 (POP3) and 995 (secure POP3 port).

Block comman attacks using iptables

You can block common network attacks with the help of iptables ; We will discuss few  attacks:

- >To block null packets use the below command
iptables -A INPUT -p tcp --tcp-flags ALL NONE -j DROP

-> To reject is a syn-flood
attack you can use 
iptables -A INPUT -p tcp ! --syn-m state --state NEW -j DROP

Note:

–i  : Insert a rule
-A : Append
-j   : option specifies the target if a rule is matched

-> To block XMAS packets
iptables -A INPUT -p tcp
--tcp-flags ALL ALL -j DROP

The server allocates a large
number of resources for this packet, as it requires more processing than the
usual packets.

Add selected services

Open the ports for your selected services and start adding to the firewall filter. Let’s start with localhost interface:

iptables -A INPUT -i lo -j ACCEPT

This command tells iptables to
add a rule to the incoming filter table (INPUT) and accept (-j ACCEPT) the
traffic that comes via the localhost interface.

Next you can allow web server traffic by adding the two ports to ACCEPT the change.

iptables -A INPUT -p tcp -m tcp --dport 80 -j ACCEPT
iptables -A INPUT -p tcp -m tcp --dport 443 -j ACCEPT

Then you can allow users to use your SMTP servers, using:
iptables -A INPUT -p tcp -m tcp --dport 25 -j ACCEPT
iptables -A INPUT -p tcp -m tcp --dport 465 -j ACCEPT

This command will allow users to read email on their server which allow POP3 traffic

iptables -A INPUT -p tcp -m tcp --dport 110 -j ACCEPT
iptables -A INPUT -p tcp -m tcp --dport 995 -j ACCEPT

Next you can allow IMAP mail protocol:
iptables -A INPUT -p tcp -m tcp --dport 143 -j ACCEPT
iptables -A INPUT -p tcp -m tcp --dport 993 -j ACCEPT

Limiting SSH access

To allow SSH traffic, connect to the VPS remotely by the following command
iptables -A INPUT -p tcp -m tcp--dport 22 -j ACCEPT

Note: You can change the SSH configuration to a different port if needed      
     
If you hold a permanent IP address, you can allow connection to SSH and the connection is available only to users around your location.

Once after finding your IP address you can create the firewall rule to allow traffic to the SSH port and then replace YOUR_IP_ADDRESS with the actuall IP.

iptables -A INPUT -p tcp -s YOUR_IP_ADDRESS -m tcp --dport 22 -j ACCEPT

You can open more ports on your
firewall by changing the port numbers, so that you can access the services you require.
In order to use outgoing connections add the below rule 

iptables -I INPUT -m state--state ESTABLISHED,RELATED -j ACCEPT

Through this you will receive
replies from the VPS on the other side of the connection.Once set up is done you
can block everything else, and allow all other outgoing connections.

iptables -P OUTPUT ACCEPT

iptables -P INPUT DROP

Save the configuration

Now list the rules to see if anything is missing out
iptables -L –n               

-n : indicates only ip addresses,
not a domain name

You can save your firewall configuration by
iptables-save | sudo tee /etc/sysconfig/iptables

To ensure everything works fine, just restart the firewall. The saved rules will run even when the VPS is rebooted.

service iptables restart

Flush to unlock yourself

In-case if you block yourselves from accessing the VPS, the Digital Ocean web interface will allow us to connect to the server via console access.
To get back to the VPS again, you can use the follwing command which will flush the filters, once logged in.
iptables -F

Hope you liked it and if any assistance needed Contact Us.

Follow us on Facebook, Twitter to get latest updates!

Monday, 2 December 2019

7 Tips to free disk space on cPanel server


When you run out of disk space, you might experience downtime, slow website loading, or emails that get sent but dose not arrive in your mailbox. You can follow below tips to free your disk sapce and maximize your server’s potential.

1.Delete user cPanel backups

Initially, You need to check whether the backup feature in cPanel is enabled or not. It will take plenty of your disk space usage, If you have got larger servers, as your users might have stored the backups on the server instead of downloading and removing them. By using the below command you can delete all user cPanel backups on the server.

for user in `/bin/ls -A /var/cpanel/users` ; do rm -fv /home/$user/backup-*$user.tar.gz ; done

Similarly, if you’re using the cPanel Backup System and are storing your backups locally on the server, you could be using twice as much space as you need to. Hence you can mount a backup server to your hosting server and store the backups there.

2. Delete cPanel File Manager temp files

You can remove the user uploaded files in File Manager within cPanel, as it creates a temp file that might not get removed upon upload.
rm -fv /home/*/tmp/Cpanel_*

3. Move or archive logs

Most of the server’s logs are stored in /var/log, which will populate your servers. Moreover, you can change the length of time and frequency of the log rotation in /etc/logrotate.conf and also enable compression to save additional space.

4. Remove cPanel update archives

You can delete or move /usr/local/apache.backup*
/home/cpeasyapache (actual name might vary based on cpanel version)
to a backup server to free little bit of space, as Cpanel and EasyApache updates leave behind files that are required.

5. Clean up Yum files

You can clean up all unwanted yum files by running a simple command, as yum updates leave package cache files on the server.
yum clean all

6. Remove pure-ftp partials

You need to find and delete your users uploaded files to the server via FTP when your server runs pure FTP as an FTP daemon. Next, the FTP server creates temporary files starting with .pureftpd-upload* that rename the actual filename when the upload is complete.
locate .pureftpd-upload | xargs rm –fv

7. Decrease the reserved disk space

You might have noticed that while checking the disk space. For example you might be using 900GB out of a 1TB drive, but it shows only 50GB available. This is because the other 50GB is reserved.
Such as for a large drives you really don’t need the whole 5%. Hence the best is to set this value to 2500 blocks and you can utilize more disk space. You can simply follow the below command.
tune2fs -r 2500 /dev/sda1


Note: You need to add the main command on the tune2fs command before you use it. This shows other options for setting the reserved space for your partitions.

Hope it helps ! For any assistance Contact Us.

Find us on Twitter and Facebook.

Wednesday, 13 November 2019

Setup YUM Repository on RHEL 8 using DVD


This guide will help you to set up a local yum repository to use locally-mounted DVD with Red Hat Enterprise Linux (RHEL) 8. This local repository lets you save internet bandwidth as well as the time for downloading packages from the internet. Since the packages are downloaded via a local network, the updates will happen at a lightning speed. YUM is a widely used software package management utility for RPM (RedHat Package Manager) based Linux systems, which makes software installation easy on Red Hat.
Repositories are generally stored on a public network, which can be accessed by multiple users on the internet. Red Hat Enterprise Linux 8 is split across two repositories,
  •  BaseOS
  • Application Stream (AppStream)
  1. BaseOS – It provides the parts of the distribution that give you a running userspace on physical hardware, a virtual machine, a cloud instance or a container.
  2. AppStream – It provides all the applications you might want to run in a given userspace.
Let's start : You need to mount the DVD ROM on any directory of your wish. For testing, we will
mount it on /soft.

Create a .repo file

Before creating a <name>.repo file, move the existing files present in
/etc/yum.repos.d/directory to/tmp, if no longer required.
mv /etc/yum.repos.d/*.repo /tmp/ 

Create a repo file called local.repo under /etc/yum.repos.d directory. 
vi /etc/yum.repos.d/local.repo 

Base OS
[LocalRepo_BaseOS]
name=LocalRepository_BaseOS
baseurl=file:///soft/BaseOS
enabled=1
gpgcheck=1
gpgkey=file:///etc/pki/rpm-gpg/RPM-GPG-KEY-redhat-release
 
App Stream                                                                                                                       [LocalRepo_AppStream]
name=LocalRepository_AppStream
baseurl=file:///soft/AppStream
enabled=1
gpgcheck=1
gpgkey=file:///etc/pki/rpm-gpg/RPM-GPG-KEY-redhat-release

Note 
[LocalRepo] - Name of the Section
name - Name of the repository
baseurl - Location of the package
Enabled - Enable repository
gpgcheck - Enable secure installation (gpgcheck is optional (If you set gpgcheck=0, there is no need to mention gpgkey)
gpgkey - Location of the key

There you go, you have successfully configured the local yum repository. If you need any assistance Contact Us.

If this guide was helpful share it with your friends, as this may help someone who is looking for how to create one in RHEL 8.


Join us on Facebook , Twitter for updates

Tuesday, 29 October 2019

Steps to fix Apache ActiveMQ


Apache ActiveMQ is an open-source message agent written in Java. It gives "Try Features" for which this circumstance means empowering the correspondence from more than one client or server. Maintained clients consolidate Java by methods for JMS 1.1 similarly as a couple of other "cross-language" customers. ActiveMQ offers the power and flexibility to support any messaging use-case. One good feature of ActiveMQ is that there is a pretty extensive unit and functional test suite.   It reduce the complexity and maintenance cost of you application. You can create a micro services and daemons for manage your business workflow.
As it supports industry standard protocols you get the benefits across a broad range of languages and platforms from Java, C, C++, C#, Ruby, Perl, Python, PHP and you can choose the one you feel more comfortable.

Establishment of Apache ActiveMQ on most recent CentOS:

To introduce ActiveMQ, you should have Java introduced on your server. On the off chance that Java isn't introduced, you need to introduce it. After Java is introduced pursue the means underneath and introduce Apache ActiveMQ.
# cd /opt
# wget https://www.apache.org/dist/activemq/5.15.10/apache-activemq-5.15.10-bin.tar.gz
Presently remove the document record and move it into the extricated catalog:
Eg:
# tar zxvf apache-activemq-5.15.10-bin.tar.gz
# cd apache-activemq-5.15.10

Key catalogs to observe while incorporating:

conf – contains the arrangement documents: the fundamental design record activemq.xml, written in XML group.
file – stores the PID record just as log documents.
lib – stores library records.
webapps – contains the web interface and administrator support documents.
bin – stores parallel record in addition to other related documents.
docs – contains documentation records.

To run the administration Apache ActiveMQ:

To run ActiveMQ as a help, you have to make an ActiveMQ administration unit document under the client called activemq
Eg:
# useradd activemq
Presently, the right consents need to set on the ActiveMQ establishment registry and the majority of its substance that has a place with the recently made client and gathering
Next make a help unit record for ActiveMQ called activemq.service under /etc/systemd/system/
Eg:
# vi /etc/systemd/system/activemq.service
Include the beneath design in the activemq.service document:
[Unit]
Description=Apache ActiveMQ Message Broker
After=network-online.target
[Service]
Type=forking
User=activemq
Group=activemq
WorkingDirectory=/opt/apache-activemq-5.15.10/bin
ExecStart=/opt/apache-activemq-5.15.10/bin/activemq start
ExecStop=/opt/apache-activemq-5.15.10/bin/activemq stop
Restart=on-abort
[Install]
WantedBy=multi-user.target
You can save it and then reload the systemd supervisor arrangement to read the recently made service, using the command - "systemctl daemon-reload" .
Next, you can begin, empower and check the status of Apache ActiveMQ administration
Eg:
# systemctl start activemq.service
# systemctl enable activemq.service
# systemctl status activemq.service
Naturally, the ActiveMQ daemon tunes in on port 61616 and you can affirm the port utilizing the ss utility:
# ss - ltpn
Before you access ActiveMQ web console in the event, if you have the firewalld administration running, then you need to open the port 8161 which the web reassure tunes in on in the firewall using the firewall-cmd tool.
# firewall-cmd --zone=public --permanent --add-port=8161/tcp
# firewall-cmd - reload

Confirm the Installation of ActiveMQ:

The ActiveMQ console is utilized to oversee and screen ActiveMQ by means of program. To access it open an internet browser and guide it toward the accompanying URL
http://SERVER_IP:8161 likewise you can check the utilizing localhost with the port 816s1
To access Admin gateway of ActiveMQ, sign into the administrator web console by tapping on the "Chief ActiveMQ agent". Here, the following URL will take you directly to the admin web console login interface.
Hope it was helpful and if you need any assistance Contact Us.

Monday, 14 October 2019

VMware Cloud on AWS adoption


VMware Cloud on AWS is the world's most powerful integrated hybrid cloud offering. It is most suitable for enterprise IT infrastructure and operations firms, looking to migrate their on-premises vSphere-based workloads to the public cloud. Organizations can consolidate and extend their data center capacities, and also optimize, simplify and modernize their disaster recovery solutions. 
It brings VMware’s enterprise-class Software-Defined Data Center (SDDC) software to the AWS cloud, so you can skip the hassles of learning new skills and managing new tools, while enjoying the benefits of the cloud.
The interesting fact is that you can add new innovations effortlessly to your enterprise applications by natively integrating AWS infrastructure and platform capabilities such as AWS Lambda, Amazon Simple Queue Service (SQS), Amazon S3, Elastic Load Balancing, etc.
Organizations can simplify their Hybrid IT operations by using the same VMware Cloud Foundation technologies including vSphere, vSAN, NSX, and vCenter Server across their on-premises data centers. With adoption of VMware Cloud on AWS you can migrate, run, and protect production workloads at scale to deliver your business outcomes. 

Benifits:

  • Increased Innovation
  • Simplified Operations
  • Reduced Costs
  • Enhanced Availability

Manage resources on VMware Cloud on AWS

You can use the same management tools you use today. You can create vSphere data centers on AWS. A vCenter Server instance is deployed as part of every VMware Cloud on AWS SDDC. You can connect to this vCenter Server instance to manage your VMware Cloud on AWS clusters. A VMware Cloud Web Console is provided and it is allowed for common task such as the add / remove hosts, configure firewalls and other basic networking settings.
Note : Tools that require plug-ins or extensive vSphere permissions may not function properly in VMware Cloud on AWS.
With VMware Cloud on AWS, you can leverage AWS's breadth of services, including compute, databases, analytics, Internet of Things (IoT), security, mobile, deployment, application services, and more.

10 cool features of VMware Cloud on AWS

1. Add Hosts Button : one click to unbox, rack, cable up, and install ESXi hosts
 2. Hybrid Cloud Extension : You can migrate live VM’s without changing the IP address! .It alos creates an optimized tunnel to move VM’s up to 50% faster. Completely software based, no additional hardware required!
 3. It’s running on bare metal hardware : Experience the same performance running your VM’s in the cloud too.
4. Integrated Chat support : Anytime, even after hours, you can chat with support and get things resolved quickly.
5. Developer Center : Test API calls right from the UI, download code samples and SDK’s from one place.
6. Avoid cross VPC egress charges, while you use Amazon Services from your VM’s in VMware cloud on AWS.
7. Long distance vMotion : Move any on-prem VM to and from VMware Cloud on AWS.
8. Firewall rules accelerator : Now you can have template for all the firewall rules you needed to setup for a particular product or service.
9. The roadmap is public : You can Filer the criteria to the features that matter most to you.
10. HTML 5 vSphere Client : Fully featured HTML 5 vSphere client.

VMware Cloud on AWS - updates and capabilities

  • A high-storage capacity option with VMware vSAN utilizing Amazon Elastic Block Store (Amazon EBS)
  • 50% lower entry-level price with new three-host SDDC minimum configuration
  • Accelerated, predictable live migration of thousands of VMs
  • Migration assessment with Cost Insight, now part of VMware Cloud on AWS core service
  • VMware NSX/AWS Direct Connect integration for simplified, high-performance connectivity Custom CPU core counts
  • Secure data with native, software-based vSAN encryption for data at rest with AWS Key Management Service (KMS)
  • Application-centric security and micro-segmentation with VMware NSX
  • Granular network visibility for monitoring, security, and troubleshooting with flow- and packet-level visibility
  • Enhanced connectivity within SDDCs enables automation and partner solutions
  • Real-Time log management included at no additional cost.
Hope you liked it. We provide Virtualization Support , click on the link to get glimpses on what we do.
Follow us on Facebook, Twitter

Sunday, 29 September 2019

Ansible and Puppet - Features to know


Ansible-and-Puppet-Features-New-to-know


To deal with profoundly complex assignments, many Configuration Management tools has been introduced and the two most well known ones incorporate Ansible and Puppet. As per specialists, setup board is an essential procedure and is viewed as basic in the DevOps model to help ceaseless integration.

Short History of Puppet and Ansible :


Puppet:

The Puppet introduced in 2005. It is considered as the greatest player in the CM business with an amazing piece of the overall industry, it is written in Ruby programming language. Ruby is an open-source programming language that keeps running on all major working frameworks like Linux, Windows, Mac OS and so forth.

The enormous IT Companies are running their information servers utilizing puppet. There is one Enterprise version too accessible through PuppetLabs. In spite of the advantages, clients' grumble that Puppet is slow to adopt requested changes, such as adding new features and fixing bugs.

Ansible:

Ansible is introduced in 2012 by AnsibleWorks. It is possessed by the Red Hat now and witnesses a lot little piece of the pie than Puppet. It is characteristic on the grounds that Ansible is later while Puppet has been around much more. Puppet is an open source rendition and it has a venture release as well, Ansible Tower. Ansible written in Python programming language and intended to be lightweight with quick sending highlights.

Python built into most Unix and Linux systems, so setting up Ansible and running can be done fairly quickly. Being agentless is one of the features most touted in discussions about Ansible’s simplicity.  This agentless nature adds to the ease of setup and use. Also, the CLI accepts commands in almost any language, which is a big benefit. It incorporates many modules to help a more extensive number of reconciliations, as AWS and that's just the beginning.

Contrasts in course of action and utilization of Puppet and ansible:

Puppet is anything but difficult to introduce and utilize. Puppet is model-driven, built with systems administrators in mind. It depends on the customer server engineering and you may introduce Puppet on different servers together.

Ansible has an ace and no operators running on the customer machines, most capacities performe over SSH convention. It is very straightforward, agentless and utilizes YAML punctuation. The mind boggling errands are overseen in arrangement documents named as playbooks and directions can be written in practically any programming language. Ansible is written in Python which is incorporated with most Linux and Unix arrangements, making arrangement simpler and quicker.

Modules :

Puppet's repository is Puppet Forge while Ansible's archive is Ansible Galaxy. Forge is huge (almost 6,000 modules), and the modules can be marked as approved/supported by Puppet, so you won’t have to waste your time on ones that haven’t been proven to work. Galaxy doesn’t have this feature, so you may have to spend some time and effort changing things manually.

Scalability :

Ansible and Puppet both are exceptionally versatile, this implies they could deal with a huge increment in hubs with no issue. Be that as it may, versatility is viewed as progressively advantageous in Ansible.

Support :

Puppet has been around from quite a long time than Ansible and clearly there is more help and greater designer network for the Puppet. You will see dedicated support portal with a knowledge base, and two levels of professional support offered: Standard (included) and Premium. To end up engaged with the Puppet people group, you can get to occasions or take an interest in different channels

Availability :

Both Ansible and Puppet have backups in case of failure. Ansible has a secondary node in case the active node fails, and Puppet has more than one master in case the original master fails.

Graphical User Interface :

Puppet's Graphical User Interface is more interactive than Ansible . You can use it for viewing, managing and monitoring. For more complex tasks, you’ll probably use the command-line interface CLI, which is based on Ruby.

At the hour of its initiation, Ansible will be in order line device as it was before and now you will get a UI if you use the enterprise version, but it’s by no means perfect . Some of the time, GUI isn't in flawless adjust with the Command line and not ready to play out very similar things like the direction lininterface.

Which will be good for use :

Both the tools are brilliant in their own specific manners for various reasons. The correct decision truly descends to your business needs. If you have small and simple organizations Ansible is useful, whereas if you have more complex or longer arrangements Puppet is useful .

In the event, if you have a fixed set of machines to maintain, then Puppet is certainly the best choice. But if your machine count is reprovisioned , Ansible will be the right way to go. The major differences between Ansible and Puppet mean that the right choice really comes down to your organization’s specific needs


Hope you liked it and stay tuned for more updates for the upcoming blogs

Join us on Twitter , Facebook


Friday, 27 September 2019

How to setup Django with Uwsgi and Nginx on Ubuntu 16.04


In this guide we will show you how to setup Django with Uwsgi and Nginx on Ubuntu 16.04. It is difficult and time-consuming to setup your server everytime. As Django is one of the best tools in its field due to its speed, scalability, and security. We thought that being said, we are going to install Django with Uwsgi and Nginx on Ubuntu 16.04 using a few methods and get your server up and running

Prerequisites
  • Ubuntu 16.04 server
  • Root privileges/ sudo privileges


Ubuntu Repositories :

Login to the server by means of SSH and how about we get all the required stuff introduced:

ssh ubuntu@your-aws-example open ip - I key.pem 
cd ~ 


After login to your server through ssh run the beneath commands:

sudo apt-get update
sudo apt-get install python-dev
sudo apt-get install python-pip


It is a smart thought to work with a virtual domain. To make condition you pursue beneath steps: 

mkdir our-projectname
cd our-projectname
pip install virtualenv


We should begin the virtualenv and enter it. 

virtualenv venv
source venv/bin/activate

Django packages 

With your virtual condition dynamic, install Django with the local instance of pip by composing

pip install django
django-admin.py startproject project_name

To check if it installed successfully,  we have to do a runserver on port 8000 

cd project_name
python manage.py runserver 0.0.0.0:8000

Now in the event that you can get to you django undertaking utilizing your server IP, 

http://IPAddress:8080 your Django project should load up.

Configuring Uwsgi :

Django project keeps running inside the virtualenv. We need Uwsgi to serve django to the web rather than the lightweight improvement server, so we just ran utilizing manage.py runserver command. On the off chance that the idea of running the runserver command on a screen passes your brain, drop it.
Run the underneath command to stop your task and leave the virtualenv

Deactivate your virtualenv:
deactivate

Presently install uwsgi system-wide on the grounds that, we'll be running the server from the root 

client
sudo pip install uwsgi

Now run your project using uwsgi.  This command does the same thing a manage.py runserver would 

do
uwsgi --http :8000 --home PATH/TO/THE/VIRTUALENV --chdir 

/PATH/TO/THE/DJANGO/PROJECT/FOLDER/CONTAINING/MANAGE.PY/FILE -w YOUR-PROJECT-NAME.wsgii


Model:

uwsgi - http :8000 - home/home/ubuntu/our-venture/venv - 

chdir/home/ubuntu/our-venture/projectname - w projectname.wsgi 

Presently
in the event that you can get to you django undertaking utilizing your server
IP, http://IPAddress:8080 your Django task should load up 

Presently on the off chance that you can get to you django undertaking utilizing your server IP, http://IPAddress:8080 your Django venture should load up

We have to run this in the 'foundation (run it and screen) so we will accomplish that next
The manner in which we will do it is by utilizing Ubuntu's systemd, which gets pid 1 and this is completely bolstered for variants 15.04 and past. We will give it a chance to initialise our uwsgi procedure.

To store our config alternatives, we have to make an 'ini' document which will contain all the uwsgi config subtleties

sudo mkdir /etc/uwsgi/sites
sudo vim /etc/uwsgi/sites/projectname.ini

We’ll load the file with the config details.
[uwsgi]
          chdir = /home/ubuntu/our-project/hello #same as above
          home = /home/ubuntu/our-project/venv #same as above
          module = hello.wsgi:application #same as above
          master = true
          processes = 5 #more processes, more computing power
          socket = /run/uwsgi/hello.sock #SOCKET_LOC
          chown-socket = ubuntu:www-data #user and user's group
          chmod-socket = 660
          vacuum = true #delete the socket after process ends
          harakiri = 30 #respawn the process if it takes more than 30 secs


save the file

We didn't specify any port like 8000 as we did previously. We will defeat this through an attachment record rather than a port as this is progressively ideal. There is no distinction, just that whatever solicitations were steered to port 8000, would now be required to go by means of the attachment record

Now we can test if this works by running the command:
uwsgi - ini/and so on/uwsgi/locales/projectname.ini

If everything works fine, we can see several lines and status as 5 or some number of procedures have 

been produced. 

we have to let systemd (Ubuntu's administration director) to deal with this:

Ubuntu's SystemD - call-> Service we make - execute-> Uwsgi ini - 
run-> Our Django Project
sudo vim /etc/systemd/system/uwsgi.service

Next you can Paste the following into it
          Description=uWSGI Emperor service
          [Service]
          ExecStartPre=/bin/bash -c 'mkdir -p /run/uwsgi; chown ubuntu:www-data /run/uwsgi' #make the 
folder where we'll store our socket file and have the right user/group permissions
          ExecStart=/usr/local/bin/uwsgi --emperor /etc/uwsgi/sites #this the command to execute on start
          Restart=always #make sure the server is running
          KillSignal=SIGQUIT
          Type=notify
          NotifyAccess=all
          [Install]
          WantedBy=multi-user.target

Save the file

What we glued is basic, the administration will execute this line everytime it comes up and ensure it is up.

The head mode checks a specific envelope (for our situation, destinations) for .ini records and flames every one of them (our hello.ini is staying there) making it helpful in the event that we have various sites.

/usr/local/bin/uwsgi --emperor /etc/uwsgi/sites

Now let’s tell the systemd to run our service.

sudo systemctl restart uwsgi

If
you want to make sure, you could do a top and see the number of processes
(search for uwsgi) you wanted to spawn + 1

So now uwsgi is running. But we need to get it to appear when an HTTP request comes in. For that, we’re going to use Nginx.

Let’s install Nginx.

sudo apt-get install nginx
sudo service nginx start

If you hit the http://IPAddress you will see a Nginx welcome page. This is because Nginx is listening to 

port 80  according to its default configuration 

Nginx has two directories, sites-available and sites-enabled. Nginx looks for all conf files in the sites-enabled folder and configures the server according to it.
sudo vim /etc/nginx/sites-available/projectname

You have to paste the following into it.
server {
    listen 80;
    server_name yourdomain.com www.yourdomain.com your-ec2-public-ip-address(if you don't have a domain);
    location = /favicon.ico { access_log off; log_not_found off; }
    client_max_body_size 20M;
    client_max_body_size 20M;
    location / {
        include         uwsgi_params;
        uwsgi_pass      unix:/run/uwsgi/hello.sock; #SAME as #SOCKET_LOC in the hello.ini

    }
}


You
can let server_name be a subdomain or multiple domains where you want to serve
the website. The uwsgi_pass must point to the socket file we had our uwsgi ini
file create. You can configure the Nginx conf far more and add a lot of things

We have to add this to sites-enabled directory, in order to be picked up by Nginx.
We can create a symlink to the file.
sudo ln -s /etc/nginx/sites-available/hello /etc/nginx/sites-enabled/

Now restart nginx and you’re all set.

sudo service nginx restart

Domain configuration

This is fairly straightforward. You need to add a simple record to your DNS records

Django configuration

During the configuration you will run into a 400 or 502 errors while trying to serve.
if you’re running with DEBUG = False and have not set ALLOWED_HOSTS in settings.

To allow those domains you have to allow hosts configured. You can allow everything,
ALLOWED_HOST = ['*'] #INCASE you want allow every host but this may turn 
out to be unsafe

Or allow the domains we configured in the nginx conf,
ALLOWED_HOST = ['yourdomain.com','www.yourdomain.com','IPAddress']

Finally, we're live with our django site.

Hope you liked it and if you need any assistance on setting up Django with Uwsgi and Nginx on Ubuntu 16.04. Contact us.

To get glimpses of our activities follow us on: Twitter , Facebook


Thursday, 12 September 2019

DirectAdmin or cPanel – Which is better?


DirectAdmin is a web hosting control panel to regulate destinations less difficult with a graphical UI like other online control panels like cPanel, centos web board. Founded in 2003 by JMBC software.  It stays in-adventure with the present most current game plans. The overall examples and clients feature sales are analyzed frequently and the thoughts are brought into practice.
Direct Admin will allow you to administer your site and adjust hosting choices by employing a graphical interface. Therefore this will allow you to manage any amount of sites, basically and in unlimited number. You can also manage email accounts, all whilst utilizing the Direct Admin control board.


Features:

DirectAdmin's web encouraging control board grows incessantly to give clients the latest headways. So go with picked programming and get presented and masterminded normally with the following:
  1. Web servers (Apache 2.4, Nginx 1.15, LiteSpeed Web Server, OpenLite Speed)
  2. PHP forms with its augmentations (mod_php, PHP-FPM, FastCGI, LSPHP)
  3. Database server (MySQL 5.5 to 8.0, MariaDB 5.5/10)
  4. Web applications (phpMyAdmin, SquirrelMail, Roundcube)
  5. Dovecot IMAP/POP3 Server
  6. MTA SMTP server (Exim)
  7. Mailing List (Majordomo)
  8. FTP Server (ProFTPd, Pure- FTPd)
  9. Server Statistics. (AWstats, Webalizer)
  10. Antivirus software (ClamAV)
  11. Anti-SPAM solutions (SpamAssassin, BlockCracking, Pigeonhole)
  12. Application Firewall (ModSecurity)

Here we can examine the distinctions, costs of DirectAdmin and cPanel.


DirectAdmin:

It is one of the easiest control sheets to use and offers access to webmail, chairman options, and your record executive hence essentially more. When you log in, you will see, everything is spread out for on one screen. This makes it easy to find what you're scanning for inside the administrative region.

cPanel:

Freshers will find cPanel easy to investigate and not under any condition like DirectAdmin, cPanel parts the features into classes, which makes them less complex to find. cPanel furthermore gives a greater number of features and modules than DirectAdmin does.
The cPanel has advanced features than DirectAdmin but the price tag is little bit higher than DirectAdmin.

Huge contrasts between these two panels (DirectAdmin and cPanel):

Direct Admin and cPanel are very similar, yet very different. They both offer  server configuration framework and UI, but DirectAdmin leaves quite a bit of the work to be done in the root shell.
cPanel, on the other hand, gives pretty much all the arrangement and handiness inside the UI. This makes it far easier to use and a predominant fit for basically all customer levels.

DirectAdmin is expandable, yet the cost of including additional helpfulness is incredibly high. With cPanel, you can add plugins and modules very easily without much or any added cost. Along with the expandability through modules and plugins, advanced users would custom have the option to code options clearly into the system.

Bottom line : Though both do the same job (hosting account management) by using GUI, users have their likes and dislikes about them.
If you have low configurations server and you have skill, DirectAdmin is good choice but if you are going to use the server to host clients websites, cPanel is good choice. cPanel is more popular for end user and it has easy interface and widely used control panel.

Virtualization Support

DirectAdmin website Link : https://directadmin.com/

Hope this was helpful and if you need any further assistance you can Contact Us.

Follow us on : Twitter , Facebook
Friday, 6 September 2019

Features and Components of Docker in a nutshell!


Today, there is a buzz all around about containerization and Docker, so let's see the features and components of Docker in a nutshell. Docker is an opensource platform for developers and sysadmins to build, ship, and run distributed applications based on Linux containers. It is basically a container engine which uses Linux Kernel features such as namespaces and control groups to create containers on top of an operating system and automate application deployment on the container. It provides a light weight environment to run the application code. Where as Containers allow users to package up an application with all the parts it needs, such as libraries and other dependencies, and ship it all out as one package.

Docker makes sure that the application will run on any other Linux machine regardless of any customized settings that machine might have that could differ from the machine used for writing and testing the code.

Features of Docker
  • An isolated, rapid framework.
  • An opensource solution
  • Cross Cloud infrastructure
  • Moderate CPU/memory overhead
  • Fast Reboot

Components of Docker in nutshell

Docker is made up of the following major components:

a) Docker Daemon
Docker daemon runs on a host machine. A docker user can not directly interact with the daemon, as the daemon needs the docker client in order to interact.

b) Docker Client
It is the primary user interface to Docker which helps users to interact with the Docker Daemon. It processes the commands from the user and communicates back and forth with a Docker daemon.

c) Docker Images
These are ready-only templates that help launch Docker containers. A docker image can be of CentOS operating system with Apache and your web application installed. These images are used to create the docker containers. Docker allows to build new images or you can simply edit and update the images.

d) Docker Registries
Docker Registries holds the docker images and these registries are either public or private stores from where you upload or download images. The public docker registry provides a huge collection of existing images for use so its also called Docker Hub. You can easily edit and update the images as per your requirements and can upload them to Docker registries.
  • When the docker pull or docker run commands, the required images will be pulled from your configured registry.
  • when you use the docker push command, your image is pushed to your configured registry.
e) Docker containers
Each Docker container is an isolated & secured application platform which holds everything that is needed for an application to run. You can perform run, start, stop, and migration and delete operations on a Docker container. Docker containers can run on any computer, on any infrastructure, and in any cloud.

Hope Docker in a nutshell was quite helpful to get an idea of what a Docker is and what are its Features and Components.

We offer server administration services with lowest response times at competitive pricing models. You can check out our Server Management plans by using the link below.

Thursday, 7 June 2018

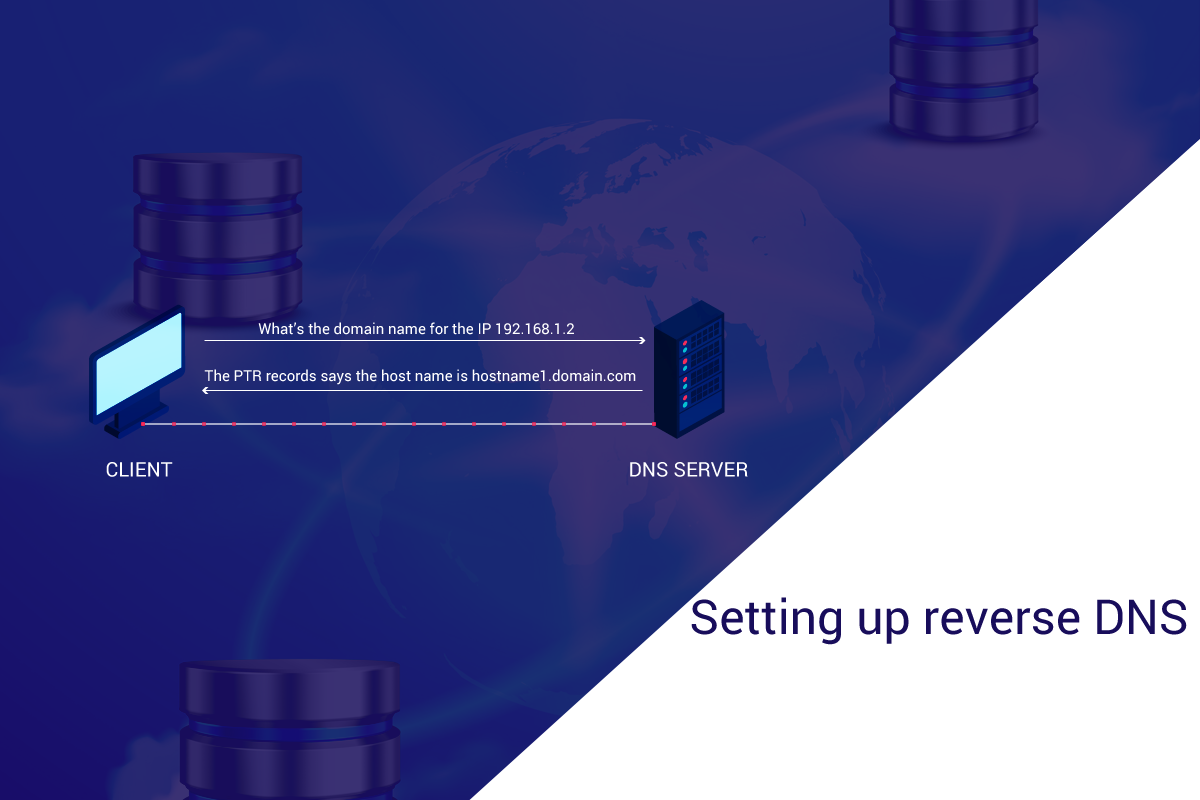
Setting up Reverse DNS Without The Help Of Data Center


In most cases, the rDNS setup will be done by the Data Center (DC) technicians. But in case if the DC delegates it to a support team like us, you have 2 choices – to leave it in the hands of server management expert like us or to do it on your own and in which case, this blog post might come handy. Come let’s see what it takes for you to setup the rDNS by yourself.


Tuesday, 29 May 2018


How to Install and Configure ProFTPD on Linux Server


In a web hosting environment, running a FTP server is an essential function and it give client access to file servers. In this blog post lets look at how to install and configure ProFTPD on a Linux server.


Friday, 25 May 2018

Five days free trial on Level 1 and Level 2 Web Hosting Support


ACTSupport offers 5 days free trial on Level 1 & Level 2 Web Hosting Support


Free trial offer from actsupport


actsupport offers seamless outsourced web hosting support, remote infrastructure management and customer support services to web hosting providers, data centers and blade server companies worldwide.


Here is a great chance for you to examine the eminence of our support even before you sign up a plan with us. Try our trial support completely free for 5 days. No-Obligation and No Credit Card required.

Sign up for the free trial today!


CraigsList Dir.org